
Info
It is strongly recommended that you only ever use the latest version (Web root procedure).
Root Procedure for Huawei MA5671A (V3 - Web serial)
Can be accessed via the link Web root procedure
Info
If this procedure does not work, you can use this alternative procedure. Do not use the V2 and V1 versions under any circumstances.
Root Procedure for Huawei MA5671A (V2 - Python)
Important
This version remains for documentation purposes only. Please use the latest procedure: Web root procedure
Info
It is strongly recommended that you only ever use the latest version (Web root procedure).
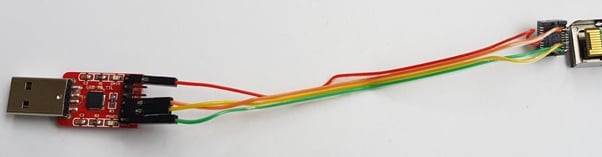
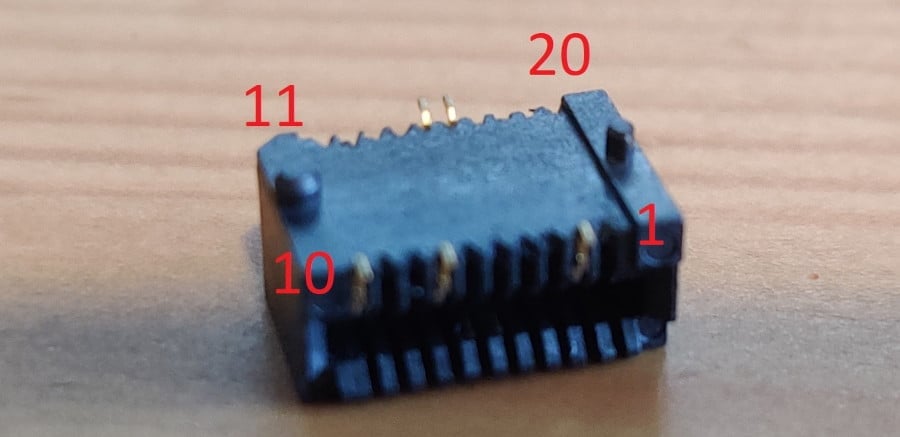
- Take the SFP molex and four coloured cables and solder them to the molex according to the following diagram:
| USB TTL (UART) Adapter | wire colour in picture | SFP 20pins Molex connector |
|---|---|---|
| 3.3V | red | pin #15 and #16 |
| TX | orange | pin #2 |
| RX | yellow | pin #7 |
| GND | green | pin #14 |
Important
Use the GND wire as an ON/OFF switch, otherwise there will be a slight delay before data is displayed on the console (putty/TeraTerm).
Note
Try PIN 10 or other GND PINs if the connection doesn't work with PIN 14.
Note
Some USB TTL adapters label TX and RX pins the other way around: try to swap them if the connection doesn't work.
- Install python and
pyserialwithpip
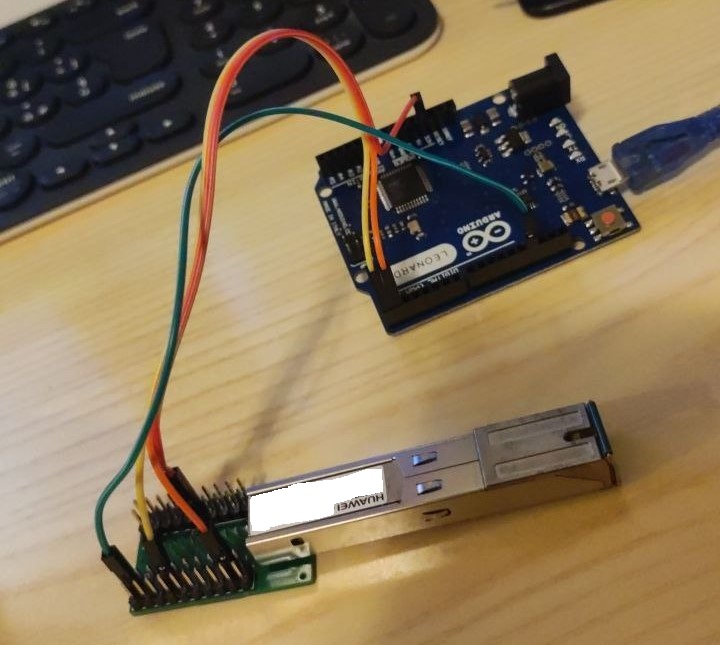
pip install pyserial- Make the connections as shown to a TTL adapter except for GND (which should remain detached as it is used as a switch)
- Open Tera Term (or other serial terminal emulators), find the correct serial port of the TTL adapter, change the port on the script on line 7 instead of
COM8. - After this, run the following python script and connect the GND pin:
import sys
import time

import serial.tools

try:
    ser = serial.Serial("COM8", 115200, parity=serial.PARITY_NONE, stopbits=serial.STOPBITS_ONE, bytesize=serial.EIGHTBITS)
    print('[+] Use serial port device:', ser.name)
    print('[+] Waiting for trigger characters...')
    while True:
        try:
            recv = ser.readline().decode()
        except Exception as x:
            print("Decode errore", x)
            continue
        if recv.startswith('U-Boot'):
            print('[+] Received! transfer enable command...')
            print('[+] Transfer command sequence 1')
            t_end = time.time() + 3
            while time.time() < t_end:
                ser.write(chr(3).encode())
            time.sleep(1)
            print('[+] Transfer command sequence 2')
            ser.write('setenv bootdelay 3\n'.encode())
            time.sleep(1)
            print('[+] Transfer command sequence 3')
            ser.write('setenv asc0 0\n'.encode())
            time.sleep(1)
            print('[+] Transfer command sequence 4')
            ser.write('setenv preboot "gpio set 3;gpio input 2;gpio input 105;gpio input 106;gpio input 107;gpio input 108"\n'.encode())
            time.sleep(1)
            print('[+] Transfer command sequence 5')
            ser.write('saveenv\n'.encode())
            time.sleep(3)
            print('[+] Transfer command sequence 6')
            ser.write('reset\n'.encode())
            print('[+] Enable command transfer complete! rebooting...')
            break
        else:
            print(recv)
except Exception as e:
    try:
        print('[!] Error:', e)
        sys.exit(1)
    finally:
        e = None
        del e

except (KeyboardInterrupt, SystemExit):
    ser.close()
    sys.exit(1)
Info
Originally, this other string was used for the setenv preboot: gpio input 105;gpio input 106;gpio input 107;gpio input 108;gpio set 3;gpio set 109;gpio set 110;gpio clear 423;gpio clear 422;gpio clear 325;gpio clear 402;gpio clear 424
- Reboot the stick
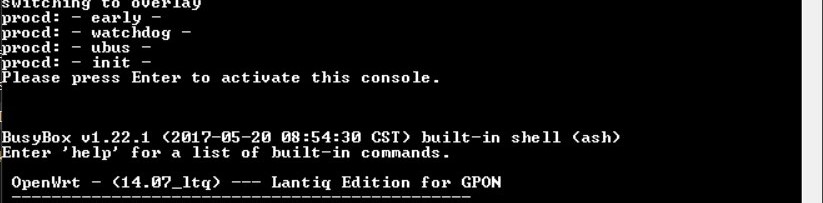
- Open Tera Term (or other serial terminal emulators), after it has loaded press
enterto activate the console
- With
sedchange the default shell from/opt/lantiq/bin/minishellto/bin/ashby editing the file/etc/passwd:
sed -i "s|/opt/lantiq/bin/minishell|/bin/ash|g" /etc/passwdImportant
Do not use vim!
Important
Be aware that kernel panics happen often! If a kernel panic happens wait for the reboot and quickly try again.
[   34.612000] Kernel panic - not syncing: Fatal exception in interrupt
[   34.612000] Rebooting in 3 seconds..
Info
The cause of these kernel panics could be insufficient supply of power.
After this is done, reboot the stick, after connecting it to a router via an ethernet mediaconverter or directly plugging it in an SFP port, with the port's IP set to any IP of the 192.168.1.0/24 subnet (the stick has the IP 192.168.1.10)
Note
If your LAN subnet is 192.168.1.0/24 make sure you have no ip conflicts.
Note
On some SFP host devices you might not be able to connect to the stick if there's no optical signal (RX loss), in that case you need to connect the fiber to make changes on the stick
- Run the terminal and login to the stick with ssh
ssh root@192.168.1.10The password is admin123.
Info
If you use a modern OpenSSH version (e.g. >= 8.8) you will have to enable some deprecated algorithms: ssh -oKexAlgorithms=+diffie-hellman-group1-sha1 -oHostKeyAlgorithms=+ssh-dss [...]
Root Procedure for Huawei MA5671A (V1 - Tweezers)
Important
This version remains for documentation purposes only. Please use the latest procedure: Web root procedure
Important
This procedure requires the physical disassembly of the stick, and the use of tweezers that can burn the stick, it is highly recommended not to use it.
- Take the SFP molex and the 4 coloured cables and solder them to the molex according to the following diagram:
| USB TTL (UART) Adapter | wire colour in picture | SFP 20pins Molex connector |
|---|---|---|
| 3.3V | red | pin #15 and #16 |
| TX | orange | pin #2 |
| RX | yellow | pin #7 |
| GND | green | pin #10 |
Important
Use GND wire as ON/OFF switch, otherwise there will be a slight delay before data is displayed on the console (putty/TeraTerm).
- Disassemble the stick by releasing the metal tabs that hold the cover in place. There are two tabs, one on each side, inside these holes:
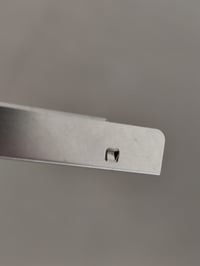
Once you have removed the metal casing, you are left with the half-naked stick. Note that the release mechanism also comes off easily, so it is recommended to take a photo and to memorise the positioning to be able to put it back together in the case it does come off.
Before shorting the stick, connect the previously soldered cables and molex to the USB serial (photo immediately below) and to the stick (via the molex, of course) and check that the jumper on the usb key is set to 3.3V
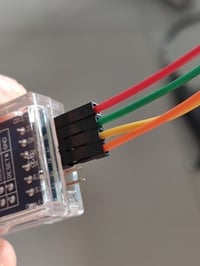
- The disassembled stick will appear as in the photo: the two pins to be shorted are highlighted in red. In the photo below a wire is used, but a pair of tweezers is sufficient (I used those, in fact). Be careful not to touch anything around the two pins by possibly covering everything else with electrical tape.
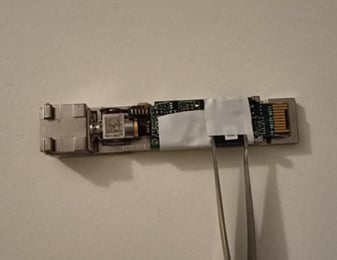
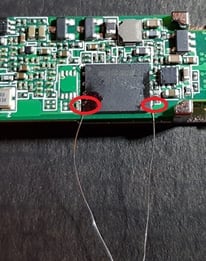
For the moment connect all cables to the usb key except the green (ground) or red (voltage), otherwise the stick will boot before you can do the following (N.B. for those who bought the uart above RX and TX are reversed). Open and configure Tera Term for serial connection by selecting the correct com port, speed 115200 bauds, english language (otherwise in japanese you can't read anything understandable), then insert the key in the PC (the adapter being already installed is taken for granted), short the 2 pins seen above and, while keeping the pins shorted, connect the missing coloured cable
If nothing happens, you have obviously done something wrong with cables, molexes, soldering irons, etc., so you will have to start from the beginning again and work out which step you did wrong. If you have done everything correctly, you should see something similar to the picture below:
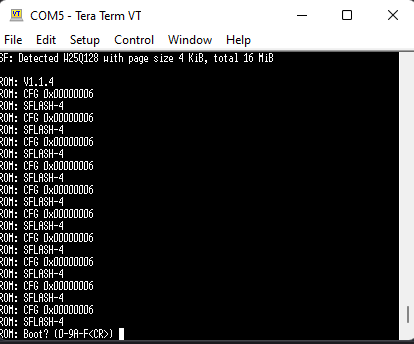
- Remove the short (tweezers or whatever you used), then type 7 and enter. You should see this:
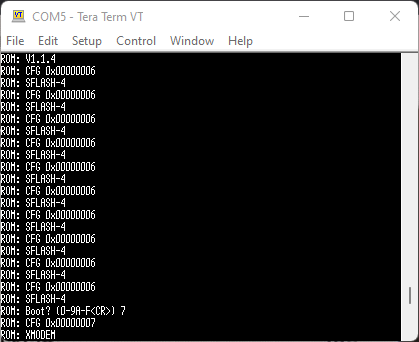
- From the Tera Term menu
FILE→TRANSFER→XMODEM→SEND→[1224abort.bin](which is the third of the files downloaded earlier):
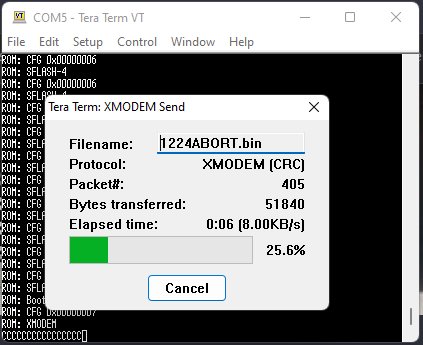
- As soon as the file transfer is complete, you have 2 seconds to press
CTRL+C. If you have not done so, return to step 6. Otherwise, you should see:
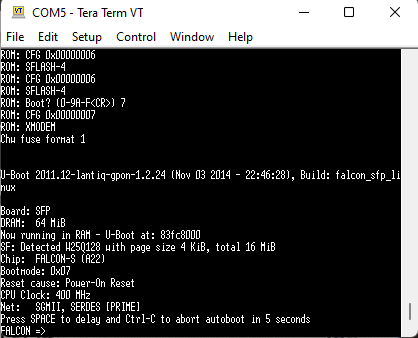
- To permanently unlock the bootloader, without having to repeat the previous steps, you must give the following commands:
FALCON => setenv bootdelay 5
FALCON => setenv asc0 0
FALCON => setenv preboot "gpio set 3;gpio input 100;gpio input 105;gpio input 106;gpio input 107;gpio input 108"
FALCON => saveenv
Info
Originally, this other string was used for the setenv preboot: gpio input 105;gpio input 106;gpio input 107;gpio input 108;gpio set 3;gpio set 109;gpio set 110;gpio clear 423;gpio clear 422;gpio clear 325;gpio clear 402;gpio clear 424
Warning
Instead of taking the next steps, it is recommended to boot and run the sed command documented in V2
- If you have done everything correctly you can reboot the stick (if you are convinced that everything is ok you could also close it again), disconnect and reconnect either the ground or voltage cable, then again you will have 5 seconds to lock the bootloader by doing a simple CTRL+C using the terminal. Now upload the firmware image of the first mtd2 partition to the stick with the command
FALCON => loadb 0x80800000At this point it will appear:
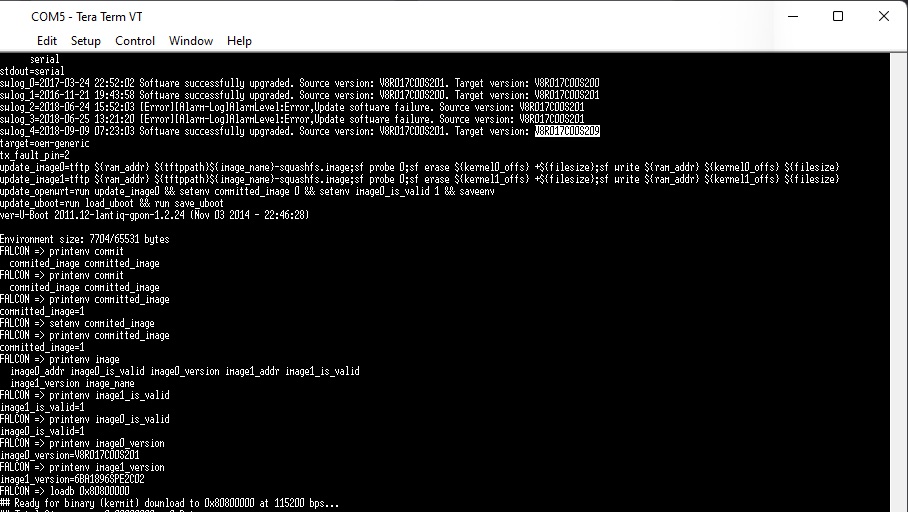
From the Tera Term menu do
FILE→TRANSFER→KERMIT→SEND→[mtd2.bin]. It will start uploading the file at a speed of about 3-4 KBps: it should take more than half an hour for the upload to complete.Once finished, the image loaded on the stick must also be saved to the corresponding system partition (the first of the 2) with the commands
FALCON => sf probe 0
FALCON => sf erase C0000 740000
FALCON => sf write 80800000 C0000 740000- Check that the stick is configured to boot from partition 0 (We are aware that mtd2 goes on 0 and mtd5 goes on 1, complain to Lantiq about this) with the command:
FALCON => printenv committed_image- If it is 0 there's no need to do anything, otherwise configure the stick to boot from partition 0 with the following commands, then check if the settings were changed correctly.
FALCON => setenv committed_image 0
FALCON => saveenv
FALCON => printenv committed_image